
Are you a startup founder or product owner struggling to bring your vision to life with a killer mobile app? The endless hours of researching and trying to understand the technical jargon can be overwhelming.
Contents:
But fear not – we’re here to guide you through the process of turning your idea into a reality. In this article, we’ll break down the steps on how to make an app in a way that’s easy to understand and implement.
So grab a cup of coffee, sit back, and let us show you the way to your project’s success.
Mobile Apps and Mobile App Development
Mobile Apps
This software is specially designed for gadgets like phones, tablets, or smartwatches. The purpose of an application can be very diverse: shopping, entertainment, assistance, and more.
A responsive website is a must for any business, but it has one particular drawback: a comparatively low level of user engagement and interaction. Even with good traffic, it may only convert a few leads.
Whereas a mobile application’s functionality and design are “tailored” to the capabilities of mobile platforms. And considering that a person nowadays is 9 times likelier to spend time using mobile apps, rather than browsers, the engagement rate of applications is much higher.
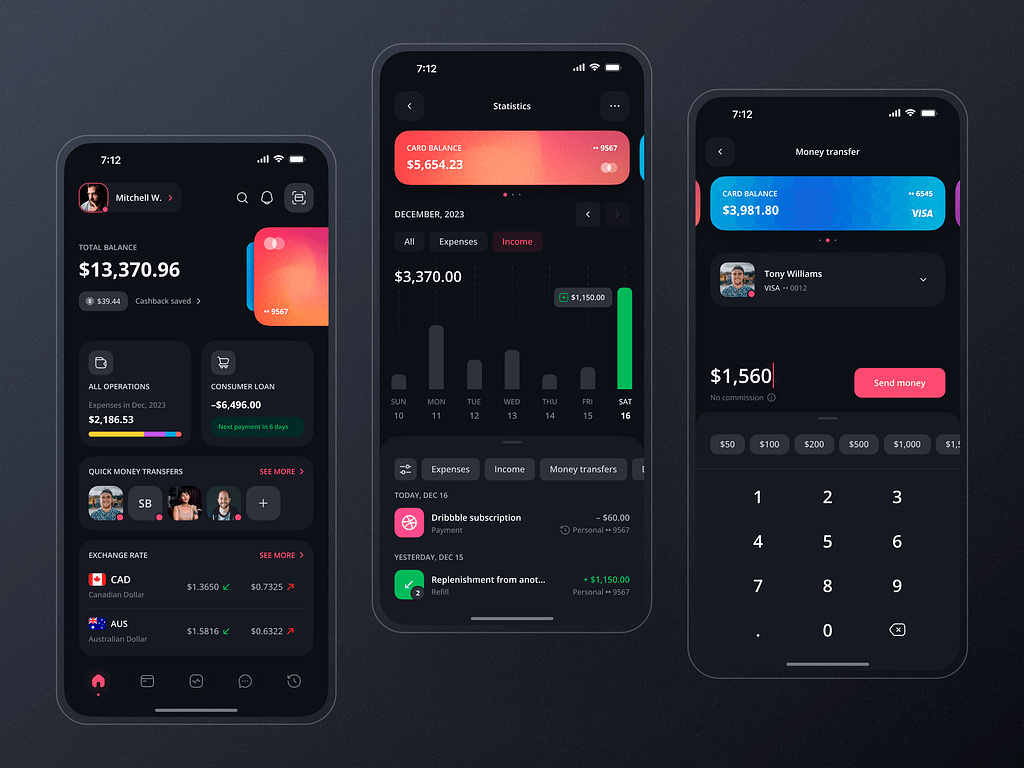
Mobile Banking App Design by Conceptzilla
Mobile App Development
Mobile app development is any kind of software creation for any mobile device. There are three main types of mobile development:
Native App Development
With this approach, you create projects for a particular mobile OS: iOS or Android, using original programming languages and tools. It typically involves writing code in languages like Swift or Objective-C for iOS apps and Java or Kotlin for Android apps. One of the key advantages is the ability to access native APIs and third-party frameworks, which can help streamline the process and increase functionality.
Hybrid App Development
It involves creating applications that are compatible with multiple mobile operating systems using a single code base. This approach allows you to write code once and deploy it across different platforms, such as iOS, Android, and even web browsers, using technologies like HTML, CSS, and JavaScript. As a result, you reach a larger audience with a single application, saving both time and money to get to market compared to creating separate native projects.
Cross Platform App Development
It is a broader term encompassing various approaches for building applications that can work on multiple platforms. This includes both native and non-native (hybrid) methods, so you also can write code once and deploy it across various platforms, such as iOS, Android, Windows, and web browsers, without the need to develop separate versions for each platform.
Just like the hybrid approach, cross platform development reaches a wider audience with a single app, as the tech can be easily deployed on different platforms using frameworks like Xamarin, Flutter, or React Native. Another advantage is the ease of maintenance and updates because changes made to the codebase can be deployed across all platforms simultaneously.
Progressive Web App Development
The sector combines the best of web and mobile apps to create fast, reliable, and engaging user experiences. PWAs offer the convenience of a website with the functionality of a native app, allowing users to access your content offline and receive push notifications. By leveraging service workers and a responsive design, you deliver a seamless experience across all devices.
Low Code App Development
This one is a game-changer for rapidly building and deploying applications with minimal coding required. By using visual interfaces and pre-built components, you can create powerful apps with drag-and-drop functionality and easy customization. This approach streamlines the process and reduces time-to-market, so even non-technical users can build their applications.
No Code App Development
In comparison with low code, this one eliminates the need for traditional coding. With intuitive drag-and-drop interfaces and visual builders, anyone can design and build fully functional applications regardless of technical expertise. So business users, entrepreneurs, and organizations can quickly prototype, test, and launch apps without writing a single line of code.
Keep in mind that each approach requires certain sets of tools for coding, UI/UX design, and debugging procedures. Also, they have their advantages and disadvantages for users and your team.
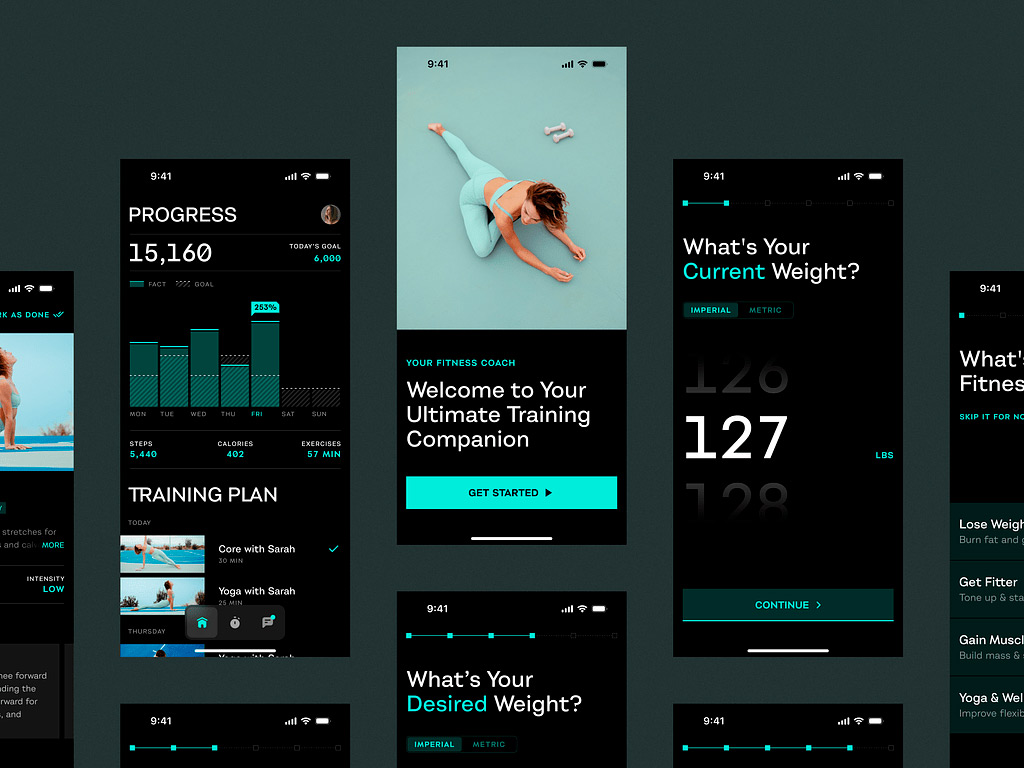
Mobile Sport App by Shakuro
Mobiliteam – Mobile App Development Army
A mobile app development project is no different from any other. You get a project manager to coordinate the work of the team, a UI/UX designer skilled in iOS, Android, cross-platform, or hybrid application design, a developer, and a QA engineer. Sometimes you will need to introduce a UX writer at the design stage, and a back-end developer if the app has complex server-side functionality.
Principles of Mobile Application Development
- Firm management. To bridge the possible gaps between the departments and the client, to make sure the next two principles are strongly abided by.
- Fixed deadlines. Timeframes are super important for apps. Such a thing as seasonal demand for an app is real. That’s why a fixed deadline attached to a fixed product specification is important and unshiftable unless something dramatic happens.
- Flexible process. This one may contradict the second principle but bear with us. Flexibility does not mean digression it allows us to streamline the high-level development process by interchanging tasks and priorities.
For Shakuro as a web and mobile development agency, it’s extremely important to maintain the same production pace and efficiency throughout all our projects. In that sense, the development of a mobile app is an indicator of the entire company’s performance.
A skilled team is capable of shipping an app in a matter of weeks. To do that, the team has to function like a well-oiled machine. A typical team is a guru, a designer, a developer, and a QA engineer. However, when choosing simplified approaches like no code app development, your team doesn’t have to be packed with specialists.
Let’s see what a standard team looks like.
1. Mobile App Development Guru (Project Lead / Strategist)
Leads the mobile app development process and aligns the team with the project goals.
-
Oversees project direction and scope
-
Balances business goals, design, and technology
-
Manages the mobile app team and deadlines
-
Understands how mobile apps are created from all perspectives
Guru is a project manager, design director, business strategist, and sometimes the client themselves. This is the focal point of all project team responsibilities. Because everybody on the team contributes to one goal – the perfect app, the guru is the one to control that motion. To make that happen, a person in charge has to possess deep and diverse experience and knowledge in the business the mobile project is targeting, design, development methodologies, and specifics. Constantly updated UX knowledge is also important. In other words, here’s the outline of a mobile project guru:
- Technical knowledge
- Business knowledge
- Design knowledge
- Team management skills
- Multitasking
2. Mobile App UX/UI Designer
Designs the app’s user experience and interface.
-
Conducts UX research and competitor analysis
-
Plans user flows, screen architecture, and navigation
-
Designs the visual style, layout, and interactions
-
A key role in mobile app design and development
A designer is not a decorator. The UI/UX designer lays out how the app will work, feel, and look. It all starts with maps and information architecture. Before the first screen is even made, there’s a ton of research on similar apps, experiences, needs, and wants people to have in the product. Visual design, colors, fonts, graphics, and illustrations are the final pieces. So first of all, a designer is:
- Usability expert
- UX researcher
- Navigation strategist
- Artwork designer
- Sometimes copywriter
The entire project after the design has been confirmed aims at the implementation of that design. All the changes must be made as to the result of users’ feedback, not technical limitations.
3. Mobile App Developer
Builds and implements the core functionality of the apps.
-
Writes code using native or cross-platform frameworks
-
Ensures performance across multiple devices
-
Integrates backend systems if required
-
Focuses on how mobile apps are developed technically
A developer is another key figure. As opposed to web dev where you typically have a back-end and a front-end team, a mobile project is done by a single team. Sometimes the app may require a back-end CMS or something and this is where some cross-functioning may happen.
In recent years, mobile developers have moved towards diversity, Android developers got into iOS and vice versa. That’s because the hybrid approach has proven to be effective and the boundaries of native app development have stretched. Mobile application development is different from the web in a lot of ways but the main difference is in the attachment to the hardware part, specifically screen sizes and capabilities of the phone.
Their primary concerns during mobile phone application development are:
-
Device compatibility (screen sizes, hardware functions)
-
Efficient code that adapts across platforms
-
Integration of back-end services if needed
4. Mobile App QA Engineer (Test Engineer)
Ensures the mobile application meets quality standards and is free of bugs.
-
Tests app functionality on various devices
-
Identifies and reports bugs or issues
-
Validates that user expectations are met
-
Critical for delivering a well-developed mobile application
A QA engineer or test engineer is a specialist in software quality assurance. The tester acts like an investigator. They search for bugs, using various deductive methods and hidden tricks. Without testing, it’s impossible to get a high-quality product. This is why QA specialists are in great demand in the IT business.
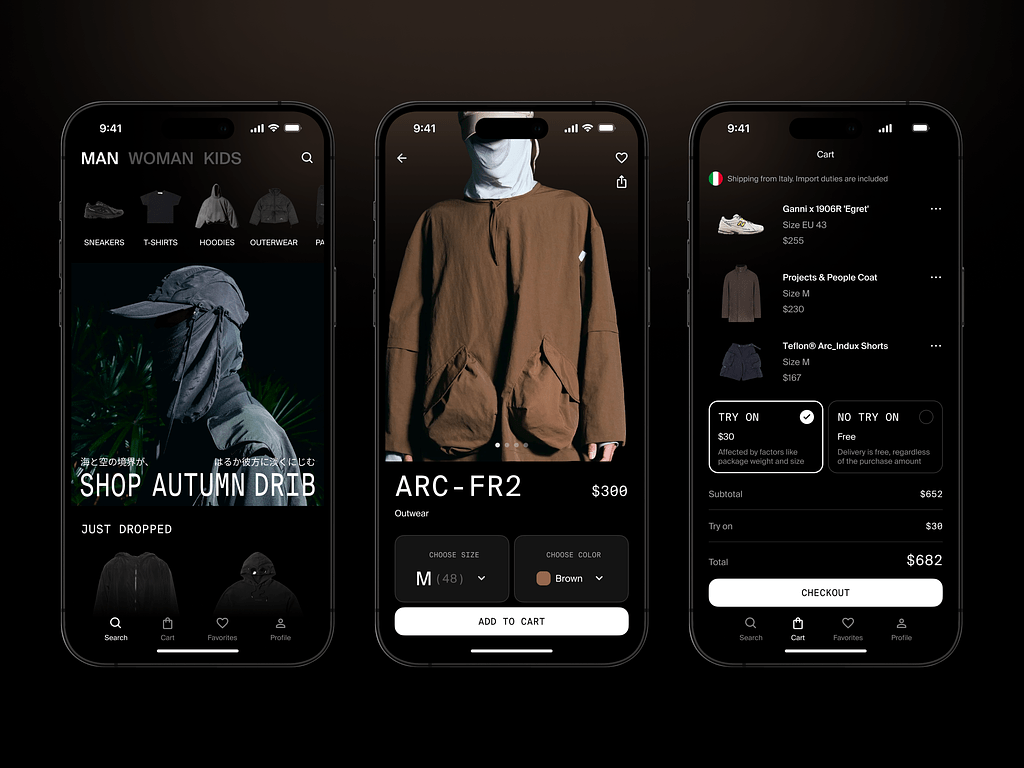
E-Commerce Mobile App by Shakuro
Mobile Platforms
A mobile device OS is not a mini-me of a desktop OS. It requires a paradigm shift in both the way information is structured and presented. With desktop OS, what you see is what you get. A mobile OS is when you see what’s important at the moment.
Mobile platforms exposed the core of UX – ease of use and pleasure, not the necessity.
With the rise of different mobile operating systems, cross platform app development is in high demand. Let’s dwell on two popular options that you can consider for your project:
iOS
Since it was invented in 2007, iOS hasn’t lost any of its significance. The reason why it came to fruition is that Apple believed the product was so good, that they could not afford to mess it up with third-party software. Apple transformed the idea of the mobile user experience and is partly responsible for making it the primary way of accessing digital information. iOS is an exclusive system that is only viable in the context of a restricted array of products: iPhone, iPad, and iPod Touch with slight deviations into Apple Watch and Apple TV.
Android
The history of Android OS began in 2003. In 2005, Google acquired the company for $130 million, and as time has shown, the deal turned out to be an extremely profitable investment. 2008 was the year the first smartphone appeared working on the open-code Android operating system. A new convenient open-source system allowed anyone to make an app, so their mass appearance soon followed.
Thus, the Android platform has provided flexible and simple features for personalizing any smartphone for a specific user. At the moment, the Android system is evolving, with the company periodically releasing current updates.
Mobile App Development Languages
To create a mobile application, you need to use a suitable programming language. Many options can affect the choice of a language and framework while developing an application, mainly the platform and features.
In general, an Android developer is proficient in:
- Java
- Kotlin
- Xamarin
- React Native
- Objective-C
- C
- Swift
Cross-platform developer:
- JavaScript
- HTML, CSS
- Cordova
- C#
- React Native
How to Make an App – App Development Process
To make a mobile application that would really shine among the thousands of others on the App Store and Google Play, it’s important to understand the main steps, affecting the mobile app development cost.
Research and Planning
During this stage, you study every detail that might make a difference: from the market and competitors analysis to the more closely related details like monetization methods. All these aspects should be considered in advance to avoid as many mistakes as you can and make the process smooth. You need to decide whether you go for low code or custom mobile app development since the costs will vary greatly.
Try answering the following questions:
- What is your target audience?
- What pain points are you addressing with your app and what problems will it solve?
- Who are your competitors? Why do people love their apps?
- What features are essential for your app? What makes it unique?
- What platform(s) will you use?
- What languages and frameworks will you use?
- How will you monetize and promote your app? How much will it cost?
- What’s the timeline going to be?
UX and UI Design
After you formed the main idea and objectives, next comes the stage of user experience and interface design. This is when you decide how your app will look and exactly how it will work, depending on the features you’ve picked during the previous step.
Your is aim to create an interactive prototype that you can use during the development stage. If you struggle with the design, opt for no code app development. It offers pre-made templates and designs, so you can quickly assemble first concepts.
You need to create:
- Information architecture. This is where you specify and detail the data, interface, and functionality of the app.
- Wireframes. They provide a visual representation of how your app looks, and its layout: the sizes of the elements, how they are arranged following each other, etc.
- Style guides. A style guide provides the details of various app functions, ensuring that the design is consistent.
- Mockups. They show the flow and are a sort of combination of wireframes and style guides. It’s a high-fidelity version of a design.
- Prototype. While mockups can provide a static view of how an app looks and functions, a prototype can show how it really works. With this demo version, you can check the visual interface, animations, user paths, and flow of the end product.
At this stage, it might be a good idea to engage somebody outside of your team or even a studio to review the prototype before passing the design to developers. It helps you reduce the number of possible mistakes before the coding stage begins.
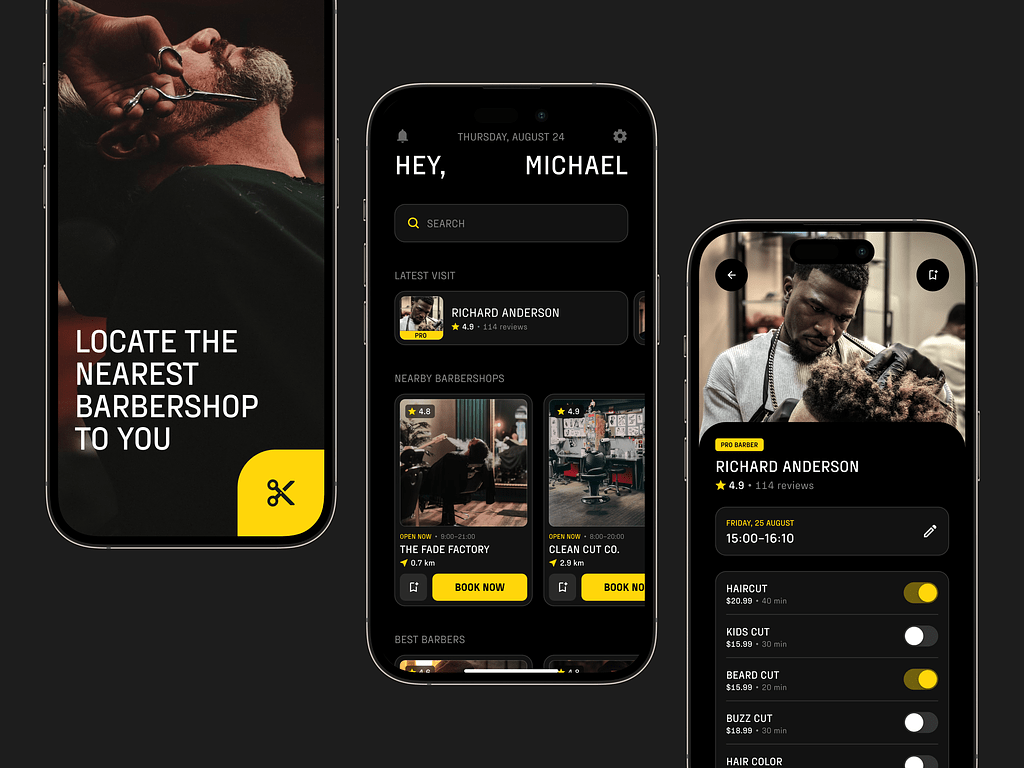
Barber Booking Mobile App Concept by Conceptzilla
Mobile App Development
This stage involves the actual coding of an application, as well as several additional activities like checking on the stores’ guidelines, for example, so that the project does not get rejected.
Developers start with the coding process after defining every point and getting a high-resolution version of every single screen.
Creating an app is a stage that consists of several large parts:
- Back-end/server side. This is primarily about databases and other server-side elements like storage solutions.
- API. It is a way for an app to connect with its back-end server as well as with tools and systems that you already use in your business.
- Front-end. Front-end is the face of your project, with which the user interacts. It connects with the back-end via API.
The development of mobile apps is a process involving a lot of iterations and fine-tuning to reach the expected result. A custom approach will be more complicated, while low code app development will be less time-consuming and costly.
Testing and Launch
When you have a fully functional app, the QA specialists meticulously examine and check the project in a variety of scenarios to minimize the chance of bugs. They go back to the initial documentation and ensure that every planned feature exists in the final version of the product and works exactly as it should. QA engineers make an app stable, usable, and secure.
When every specification is met, and the product is approved by project managers, designers, developers, and testers, comes the long-awaited stage of launch.
Support and Maintenance
The story doesn’t end with launching an app. If there are bugs detected during real-world usage, they get fixed. If the first few months show that an application has further opportunities for development, you can choose to make an arrangement for maintenance or start a new cycle.
App maintenance services are very effective, they help keep a project healthy, up-to-date, and in the best condition. Projects based on low code app development require less maintenance effort since they are built with pre-made assets – not much to tweak.
How to Publish an App on Stores
Publishing your app is a crucial step in reaching a wider audience and generating downloads. Here’s a step-by-step guide on how to publish an app on the App Store and Google Play Store.
Developer’s Account Creation
Before you can publish your app, you’ll need to create a developer account. For the App Store, you’ll need an Apple Developer account, which requires a one-time fee. For the Google Play Store, you’ll need a Google Play Developer account, which also requires a one-time registration fee.
How to Publish an App to the App Store
- Create and log in to your Apple Developer account, then navigate to the App Store Connect dashboard.
- Click on the “+” sign to add a new app and fill in the required details, including the app name, description, keywords, screenshots, and app icon.
- Upload the build of your app using Xcode or Application Loader.
- Fill in the app Store Listing details, including pricing, availability, and content ratings.
- Submit your app for review, where Apple will check that your app meets their guidelines and standards.
- Once approved, you can set your app to go live on the App Store.
How to Publish an App on the Google Play Store
- Log in to your Google Play Developer Console and click on “Create Application.”
- Fill in the necessary details such as the app name, description, screenshots, app icon, and content rating.
- Upload the APK file of your app and provide details about your app’s target audience, distribution, and pricing.
- Submit your app for review, where Google will assess your product for policy compliance.
- Once approved, you can set it to go live on the Google Play Store for users to download and enjoy.
Booking App by Shakuro
Publishing Progressive Web App
Publishing PWA is different from publishing a traditional mobile app on app stores. They are web-based applications that can be accessed through a browser on any device without the need to download from the store.
- Develop Your PWA: First, you need to develop your Progressive Web App using web technologies such as HTML, CSS, and JavaScript. Make sure your PWA is responsive, fast, and provides a seamless user experience, both online and offline.
- Secure Your PWA with HTTPS: One of the requirements for PWAs is to have a secure connection via HTTPS to ensure data privacy and security. Obtain an SSL certificate for your website to encrypt data transmitted between the user’s device and your server.
- Add a Web App Manifest: A web app manifest is a JSON file that defines metadata for your PWA, such as the app’s name, icons, colors, and display mode. This file helps browsers recognize your website as a Progressive Web App and allows users to add it to their home screen.
- Register a Service Worker: Service workers are scripts that run in the background of your PWA and enable features like push notifications, offline functionality, and caching. Register a service worker in your PWA to enhance the user experience and performance.
- Promote Your PWA: Unlike traditional apps, PWAs are distributed via web URLs. You can promote your PWA through your website, social media channels, email newsletters, and other marketing channels to drive traffic and encourage users to add your PWA to their home screen.
Conclusion
So this is the basics of how to make an app. It is a complex and challenging process, but with the right approach and guidance, you can turn your app idea into a successful reality. By following the steps outlined in this article, you can prepare for mobile app development challenges and pass all the trials successfully.
Do you want to create a mobile product? Contact us and let’s build a versatile application that will catch your client’s eye.
Frequently Asked Questions
How much does it cost to make an app?
The budget depends on various factors like the project’s complexity, the team’s experience, market situation, amount of features, etc. In general, an in-house team will cost you up to $150/hour, while an outsourcing agency asks for around $40-45/hour for development and around $75-80/hour for the design.
How long does it take to build an app?
Again, depending on the needs of your business, the time it takes to create an application ranges from several months to a year. Whatever the case, we have expertise working on time-sensitive projects and are ready to provide you with a tailored timetable for your unique project so that you do not miss out on the benefits of excellent timing.
How much does it cost to publish an app on the app stores?
In the Apple App Store, there is an annual fee of $99 to publish apps. Additionally, if you plan to offer in-app purchases or subscriptions, Apple takes a 30% cut of those transactions. As for the Google Play Store, you have to pay a one-time registration fee of $25. They also take a 30% cut of in-app purchases and subscriptions.
What kind of apps are most popular?
Overall, social media applications like Instagram, TikTok, Facebook, and WhatsApp are the most popular right now. Still, each sector has its own favorites. For example, the music sector is dominated by Spotify, YouTube Music, Amazon Music, and SoundCloud. The most popular dating apps are Tinder, Bumble, and Badoo.
The article was originally published in April 2020 and was updated in April 2024 to make it more relevant and comprehensive.