In today’s world, people solve the majority of their vital problems using their smartphones. The healthcare industry is no exception, especially in our new COVID-19 realities where so much depends on remote services. Add to that the growing prevalence of chronic diseases and the rising use of wearables. The mHealth (Mobile + Health) industry is thriving in the USA as in the rest of the world making the future of healthcare app development look bright.
Contents:
These and other factors make this lucrative industry of mobile apps for healthcare attractive for investors and entrepreneurs. Seeing the level of competition the latter have to face, it makes sense to pay attention to every detail of the mobile development process from the preliminary market research to design, development, and maintenance.
Let’s go through the main points of healthcare app development so that afterward you would have a comprehensive account of what it takes to create a healthcare app and what distinguishes it from other types of apps.
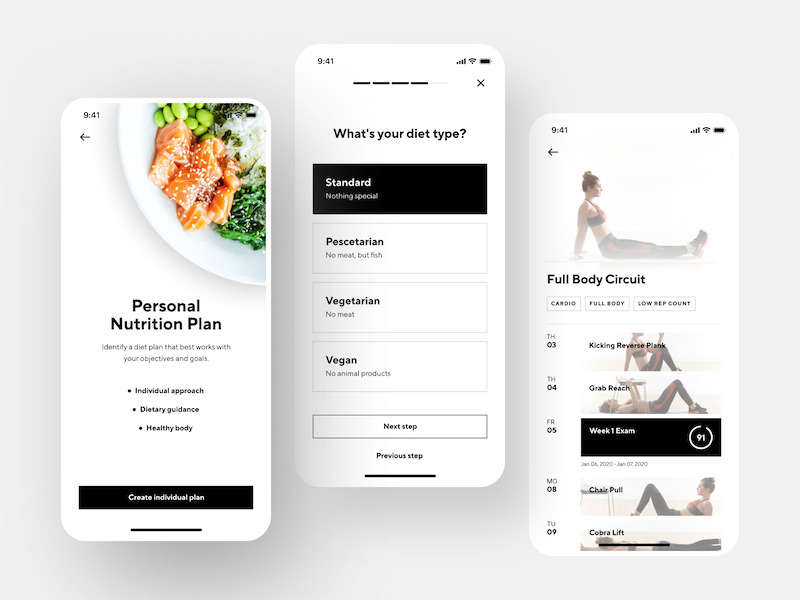
Fitness App Interface by Shakuro
The benefits of healthcare apps for patients and business owners
What is a healthcare app? These are tools that help to accomplish health-related tasks. They range from lifestyle mHealth solutions like fitness and meditation apps to sophisticated products that rely heavily on technological progress like apps that assist medical professionals in identifying and solving complex medical issues.
A lot of people are too engrossed in work and solving everyday problems to take care of their health. Here’s where the products of healthcare app development can be a real lifesaver in solving various issues, large and small. For example, if to get a healthcare service a person has to perform a series of elaborate actions and wait in line compared to making a few taps on the phone, the choice is obvious.
Moreover, they also offer many business opportunities for entrepreneurs.
Benefits of mHealth apps for patients:
- Keeping a well-being diary
- Updated information on drugs and vaccines
- News digests and reviews
- Online consultations with doctors
- Tips and advice for your disease
- Easier appointment process
- Various service functions, such as reminders to take a drug or a calorie counter.
- The opportunity to create a personal account with an electronic medical record.
Benefits of mHealth apps for business owners:
- Increased customer loyalty by offering valuable experience. People tend to choose those healthcare services that can grant them full and convenient access to all their medical data. For example, the ability to get all the information they need online, make an appointment, or view test results without leaving their homes
- Increased engagement by building a closer relationship with your customers. Create a mobile application for a medical center that provides regular notifications about news, promotions, special offers, and appointment reminders. That way you will turn one-time clients into regular ones who will use your services for years
- The easiest way to gather customer information. Everything is done automatically
- Attract new customers. A convenient and useful app that makes your clients’ lives easier can become your competitive advantage
- Save staff time. If you manage a clinic, you can use an app that will be integrated with its centralized database. Then each doctor can view the patient’s electronic medical record and history, test results, and make a new entry. The time that was spent on paperwork will now be used much more efficiently and improve the quality of services
- Create a product that will improve or even save many people’s lives
- Offer more services to the clients and promote your business.
All of the above means one thing: there’s no point in building an app just for the sake of it. Think of profit. Yours and your clients’.
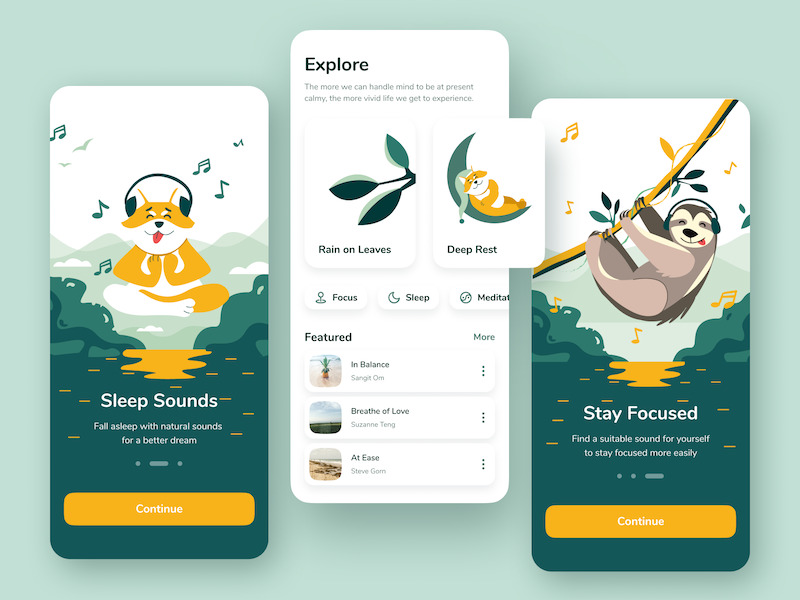
Ambient Sounds App by Shakuro
Types of apps for health and wellness
If you’re not yet sure what fits your idea, it’s better to familiarize yourself with the most common types of medical apps. By use of mobile apps in healthcare, they can be broadly divided into 3 major categories:
For patients:
- Appointment scheduling
- Fitness and wellness apps
- Mental health apps (including meditation)
- Self-diagnosing
- IoT products
- Applications for caring for the elderly and sick people
- Patient’s well-being diaries, vital signs monitoring (blood pressure, pulse, glucometer data)
- Health management apps such as water monitoring, calorie calculator, diet tips, etc.
- Social networking, health forums, and portals
- Assistants for pregnant women
- Women’s health
- Telemedicine
For medical professionals:
- Medical resources and education apps that contain information about drugs, medical articles, or lists of symptoms
- Remote diagnosing
- Remote monitoring
- Communication
- Appointment management
- Telemedicine
For institutions:
- Clinical assistance apps with EMR and EHR access
- Appointment and scheduling
- Billing
- Inventory management.
With all this dexterity, there’s always room for creative ideas to fill a vacant niche in the mHealth space. For example, Fit for Bucks is a deeply integrated wearables mobile application we helped to make that counts the number of steps people take during the day and gives points that can be spent as discounts in local stores. That’s a unique idea helping local business owners build better conversion while promoting physical activity among people.
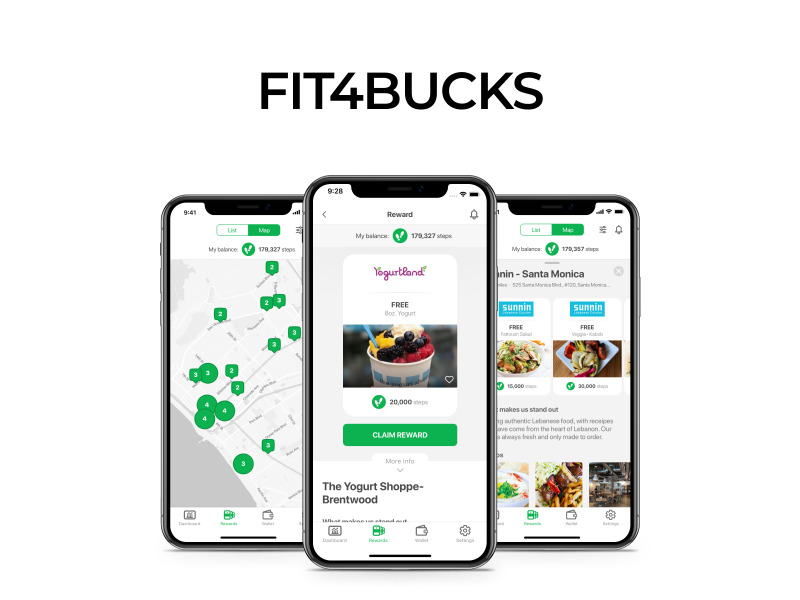
Fit for Bucks app design by Shakuro
Top healthcare apps by revenue
According to Statista, the list of leading health & fitness apps worldwide for 2022 looks like this (based on Google Play Store statistics):
- Fitbit — an app to track basic stats and stay motivated. It’s also possible to get a Fitbit tracker or smartwatch to see how the activity, workouts, sleep, nutrition, and stress all fit together.
- Strava — an app that’s now a part of the life of many cycling sports enthusiasts, who cannot imagine training or any physical activity without it. Such devotion has been achieved through a combination of a workout diary, GPS trackers, and social networking features.
- Flo — a popular female health & well-being guide. It’s a one-stop solution for all things female health and well-being, Flo provides all-in-one tracking for period start date and length, fertile window, peak ovulation days, PMS symptoms, flow intensity, birth control, and much more.
- Calm — an app for meditation that lets you set goals — to reduce anxiety, improve sleep, increase focus, etc. You can choose from high-quality nature backgrounds and sounds. A couple of its functions deserve special mention — there are bedtime stories for better sleeping and the Masterclass section that is not directly related to meditation, but contains a collection of audio master classes on improving the quality of life.
- Headspace — another meditation app that lets you choose a program depending on the level of training, circumstances, and goals. One interesting solution is short minute-long meditation sessions for when you want to clear your mind here and now: Health (to maintain health), Brave (to cope with negative emotions), Happiness (to enhance life quality), Work & Performance (to increase productivity), and others.
The most profitable examples of mHealth apps are predominantly lifestyle mHealth solutions due to their ability to cater to the needs of larger audiences. However, it doesn’t mean that it’s not worth thinking about more narrowly focused products. The list of top-tier performers can be used as a reference for what people like and prefer in healthcare apps.

Industry and mHealth apps market overview
Why develop a healthcare app? Is the use of mobile apps in the health sector profitable? What are the potential growth possibilities of the mHealth industry? If you’re thinking about creating a healthcare mobile app, it’s worth analyzing the market. Due to the pandemic and the way it changed some of the everyday aspects of our lives, we are confident that healthcare development is now more relevant than ever. People look for information on disease treatment on the internet, use drug delivery services, and exercise using home workout apps. There is a growing demand for medical IT solutions made by healthcare app developers that can provide doctors with the means to perform remote consultations.
According to the report by ResearchAndMarkets, the global mHealth market size is expected to reach $316.8 billion by 2027. Grand View Research expects it to expand at a compound annual growth rate (CAGR) of 10.8% from 2023 to 2030.

Such demand for mHealth app solutions is due to the increasing prevalence of chronic diseases such as diabetes, cardiovascular disorders, and obesity, and the rising adoption of digital health technologies. The combination of these factors and the growing popularity of wearable technologies account for the booming expansion of the sector and the projected revenue growth.
Indeed, a survey by Vicert reveals intriguing health app usage statistics. 77% of young adults (18-29) used their phones to look up health conditions, while 84 million people in the U.S. used healthcare apps. This means that roughly 30% of adult smartphone users rely on this technology to give them better information about their health.
Yet, the healthcare and wellness app market is still far from being oversaturated due to the shift it has been experiencing in recent years. Even a few years ago the list of such apps consisted primarily of health and lifestyle apps, like fitness apps, it’s starting to incorporate more and more applications that are focused on specific tasks like acting as a complementary app to a medical clinic or helping people with specific kinds of diseases.
Before you start: Health app market research
Before you begin to delve into the intricacies of healthcare app development and design, it’s important to perform market research that can greatly affect the development of your mobile app for the healthcare industry.
Identify a problem and the target audience
The first step on the way to creating a medical app is to keep in mind that every aspect and feature depends on the end user. Everything should be done based on the user’s perspective. Regardless of the app type that you’ll choose to make, any mHealth app is a great way to attract and retain customers and raise income as a result, so it should be focused not on the product and services you provide but the end-user and their needs, wishes, problems, and pain points.
Before making a single design decision or writing a line of code, it’s better to analyze the target audience: its portrait, traits, characteristics, key goals, and objectives. After having gathered this information, you can set the priorities and determine what features and functions are of the essence and what can be done later. These findings also help healthcare mobile app development companies give a more precise budget forecast.
Answer the following questions:
- What problem will the app solve?
- Who will use it and why?
- What characteristics (gender, age, education) distinguish your target audience?
- Are there ready-made, similar to yours, successful solutions on the market?
Try to focus on one problem that will be solved by the application, and not all at once. Don’t try to create a universal product with all the possible functions.
In the case of apps for health, to test the relevancy of your idea, as well as make use of healthcare mobile app development services, you’ll also need the help of someone in the field with industry-specific knowledge.
Know who your competitors are
Continuing with the previous point, we recommend you compile an up-to-date list of competing apps before submitting yours in stores. Gather basic information: launch date, average rating, and several updates. Study user reviews as you will need them to better understand the interests and preferences of your audience. It’s equally important to highlight the flaws of your competitors and fix them in your app.
By studying your competitors, make sure you end up offering something better or unique. Your product has to have a unique selling point (USP). For example, there are many dieting apps, but the USP of Lifesum’s food tracking app is the number of options available from a classic diet to one tailored to your genetic factors if you pay for a DNA test.
Determine what platforms and mHealth technologies to use
Depending on the target audience, the next step is to determine what platforms and technologies to use for your project. The choice of a platform (iOS or Android) depends on various factors, economic and user-oriented. For example, older patients are less likely to be users of wearable technologies. They prefer to use websites and tablets. Whereas the younger audience prefers mobile apps. Geographical, gender, and income factors also play their role.
It’s possible that to reach the maximum number of users you’ll need to create native apps for both iOS and Android. Then again, your target audience may significantly prefer one platform over the other. Check these things out on Statista and similar resources.
Will your app require the use of a camera? GPS tracker? Integration with the iOS HealthKit? The important point is that you don’t have to implement everything at once, but planning will serve you well.
Choose a monetization model in advance
Apps for medical institutions are usually not monetized and serve as an additional service by themselves.
If you see an app as your main product, think about how you’re going to make a profit from it. Do it well before designing anything let alone, developing, because the way it will be designed and developed defines the way it will be monetized.
Paid healthcare apps are usually monetized via subscriptions. Although, the vast majority of modern apps, especially the highest-grossing ones, are free. Free apps get their profits primarily from providing paid access to additional premium services or by advertising. This freemium strategy has proved to be much more beneficial. However, there are more ways to monetize your free app.
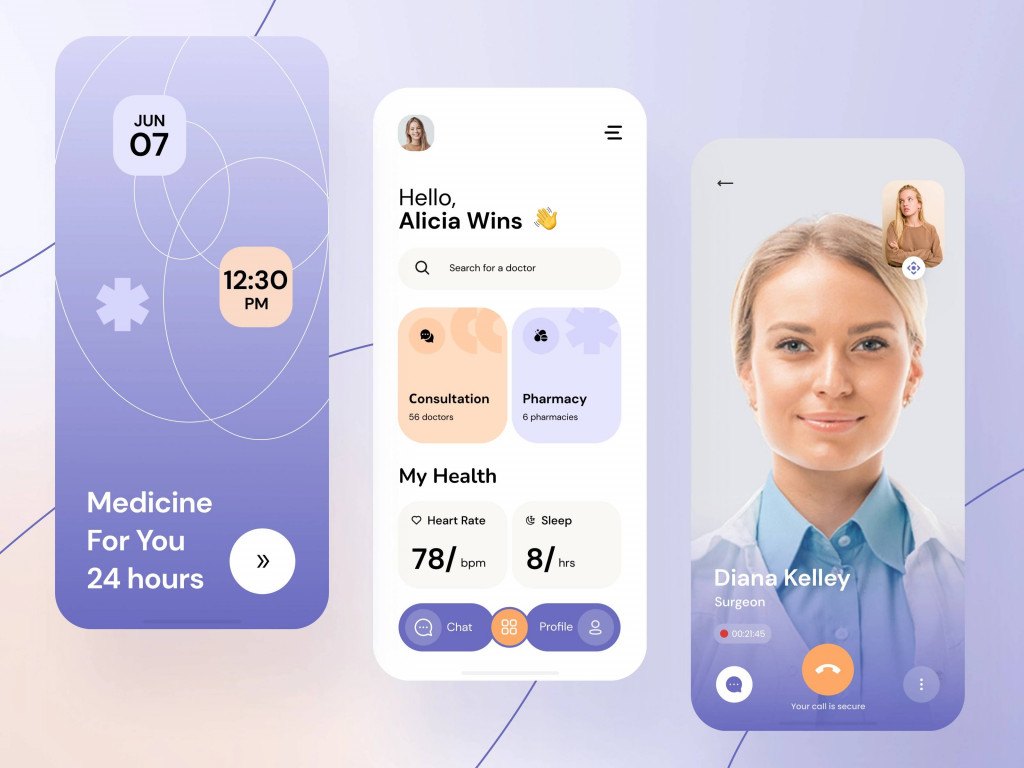
Healthcare service by Anastasia Golovko
Why healthcare apps and startups fail
There are a great many medical apps on the market. However, not every one of them survives the competition. Generally speaking, only about 30% of startups make it to the 10-year mark with every fifth failing during the first year and the percentage of failed healthcare startups is even higher. As said earlier, the most significant reason for failure is the inability to determine the target audience, their problems, and ways to solve them. In other words, often apps turn out not to be needed at all.
For example, today, in connection with the spread of coronavirus, apps have begun to appear that notify users about the spread of viruses and reports on methods of treatment. Were such apps to win such popularity before? Not likely. Due to the Covid-19 pandemic, gyms around the world have been temporarily closed during the spring of 2020. This made an immediate surge in the popularity of home workout apps.
Developing a mobile application for solving medical problems is a complex endeavor and a big responsibility. For instance, complicated navigation and an incomprehensible interface can lead to incorrect data entry and, as a result, errors in diagnostics and calculations when prescribing therapy.
Other factors also play their role. If we are to outline the common reasons for healthcare app failure, then many healthcare apps fail to live up to their users’ expectations because of:
- the failure to solve a specific problem
- a lack of clinical input
- poor usability
- failure to follow privacy and security regulations.
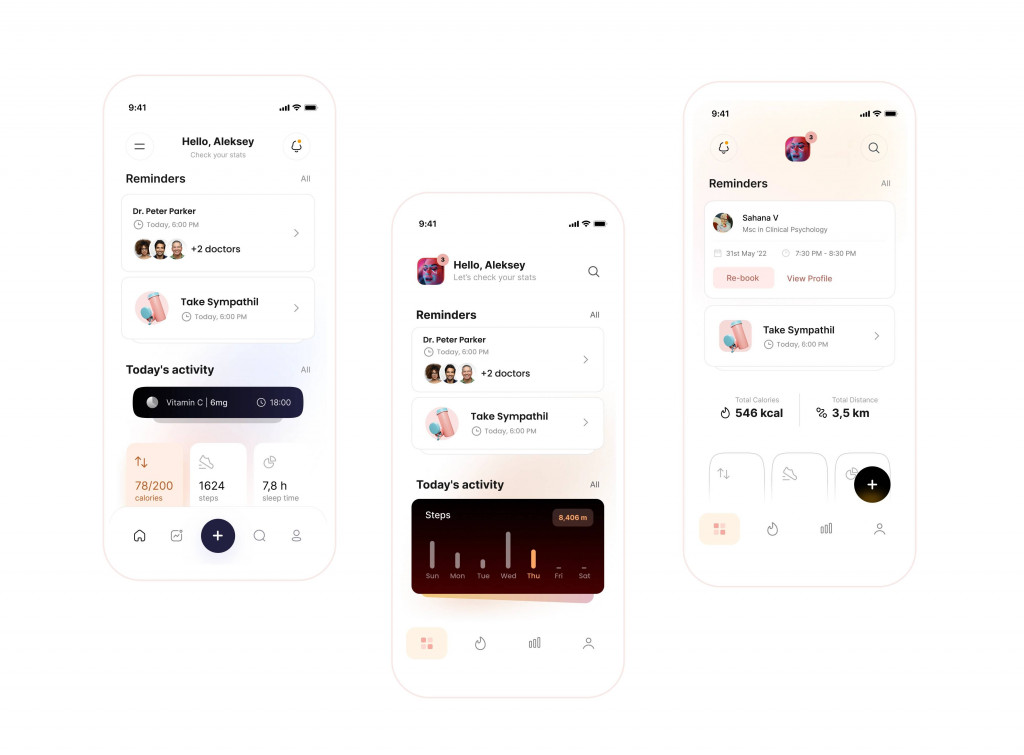
Wellness tracking by Aleksey Bondarev
Build an MVP first and test it
The timing factor is essential for startups. However many steps a healthcare app development process may contain, one of its main principles is not to delay the launch of your product to the moment when it won’t be relevant anymore or it will get outcompeted by your rivals.
Building an MVP first will be a wise decision. It’s a product that has only essential features and functionalities, while non-essential are added later with updates or a pro version. At the same time, MVP looks solid and lets you launch the project on time.
It’s impossible and counter-productive to try to build a perfect app at once. It takes years to accomplish. The sooner you launch your product, the better chances you have for creating relationships with your customers and filling the market niche.
Plus, with an MVP you can test your app quicker and determine its weak points and adjust branding and marketing strategy, simultaneously working on its features. By the way, with an MVP, you can get your healthcare app idea on Kickstarter and get it funded.
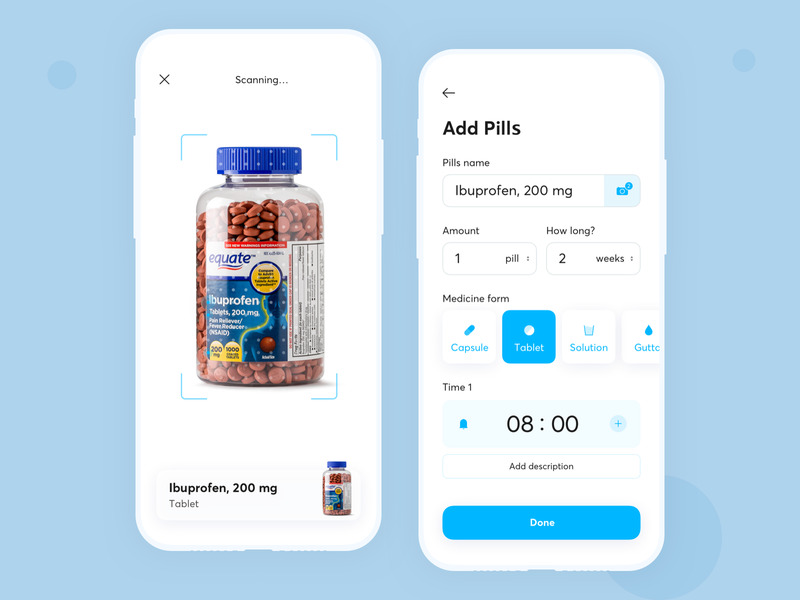
TFP — Add Pills by Victor Nikitin
What features people expect from healthcare apps
Let’s see what makes people keep particular medical apps on their phones and brings them tangible value. The list of features depends on the app’s purpose and can vary greatly. For instance, a fitness app and a medical reference app for professionals would be very different. Still, some features are more common in healthcare apps:
- Tracking. It’s used by patients and doctors alike to monitor the state of health either by a person themselves or by their physician.
- Scheduling. Patients can make appointments that are managed by doctors.
- Push notifications and reminders.
- Payments. These include different third-party payment systems like Visa or Paypal to pay for the services. Transaction history will be a plus.
- Integration with wearables such as Apple Watch, Fitbit, or Garmin.
- Personal account for a patient or a doctor profile. The former lets you receive all the messages and notifications and have the information on the state of your health all in one place. The latter is a quick way for prospective patients to find doctors near them and review their credentials.
- Telemedicine options. Remote diagnosing has become more popular in recent months due to the COVID-19 pandemic. Real-time chat and video to help patients connect with doctors in case of emergency, or to discuss diagnoses or treatments.
- Security and privacy. Users expect the security level to be on par with financial apps.
- Reporting and charting functions.
- Social integration and networking.

Vitamins management application by Ann Soly
Challenges when developing a healthcare app
Heath is a personal matter and deals with a lot of sensitive information. A nice design and technical performance are nothing without clients’ trust. You have to make your audience believe you. To achieve this goal, you have to work consistently on every aspect of your app.
Security and privacy
Security and privacy are of the utmost importance when it comes to the matter of personal healthcare software. Unlike other applications, medical software protection should not only act against possible cyber attacks but also work following the requirements of current legislation. Your future application must comply with international and national privacy requirements that determine the rules for working with medical data.
During healthcare app development in the USA, you will mainly have to obtain certifications through the Health Insurance Portability and Accountability Act (HIPAA) whose purpose of existence is to ensure patient data protection.
In Europe, a medical app must be compliant with the General Data Protection Regulation (GDPR). It specifies what a business can and cannot do with private information and determines the ways it should be protected. Moreover, this regulation governs any data activities on all EU citizens. It means that no matter where your business is located if you gather the EU citizens’ information, you have to comply with the GDPR.
As for the United Kingdom, the new Data Protection Act (DPA) is the major governing legislation. It sets limits on the appropriate storage and use of personal information and mainly follows the GDPR with some modifications.
Data encryption
It’s important that all of the patient-related information travels only through encrypted channels. Developers working on mobile medical apps should ensure that they follow certain standards and keep track of the latest requirements. Every day, more than 7 million unencrypted data records are being compromised, so it’s up to you to keep your customers safe. The company’s reputation is at stake.
APIs and integrations
To make use of the modern tendencies to use the benefits of wearable technologies, your app is likely to be integrated with other devices and tools. In other words, you need to make two products perfectly fit together and provide each other with consistent data. For example, when developing the Fit for Bucks app, to make it function as it was supposed to, we had to integrate it with wearables through the native iOS HealthKit tool.
Multiple devices and channels
Before you create an app, it’s also a good idea to think about how you will scale it. What are its growth points and opportunities? Will it need a website (in general, every product does, if only for marketing purposes)? What about creating an ecosystem for it using a smartwatch, for example? If it’s an app for a clinic, will it be a CRM for medical workers? Think over the future touch-points of your app.

Medical CRM – App Design by Anastasia
Health app design principles
The look and feel of a health and wellness app should cater to the needs of daily use. Better to make a medical app look like it has nothing to do with medicine at all and at the same time keep it clean and minimalistic, as dictated the modern app design trends. The choice of colors for user interface design for healthcare applications depends on the app’s purpose and target audience. In the majority of cases, healthcare apps are done in calm, neutral colors, though it may vary depending on users and the app’s intent.
Another point in medical software design is making the app as simple as possible in contrast to the complexity of the industry to which we all seem to be accustomed. Without belittling its actual complexities, the main purpose of an app is to be used by ordinary people the majority of whom are very far from medicine.
Becoming a medical professional is one of the most difficult occupations. However technologically sophisticated your app would be and how heavily it will rely on the latest AI, AR, and other tech advances (more on this point later) it could never replace human professionals who spend up to 15 years to become experts. Don’t try to make your app look artificially (or even genuinely) abstruse to look serious and gain your users’ trust. Better make the interface and user scenarios easy to understand, it’ll be appreciated. Users should feel like an app makes their lives easier, not the other way around.
Make it as personalized as possible. Like every other app, the problem with healthcare applications is that many of them get downloaded and deleted after only a couple of uses. Sometimes the issue can be connected to insufficient customization and personalization.
One of the characteristics of healthcare app development is that there’s usually no place for one-size-fits-all solutions. Every person has a unique state of health. There are too many variables.
Think about medical app UI design accessibility. Digital accessibility refers to the practice of creating digital designs for a wide range of people, including people with visual, hearing, speech, motor, and cognitive impairments. There’s no better place to follow these modern guidelines than here.
Don’t overdo it with the design, though. Otherwise, it will affect the speed of the application. Neither patients nor doctors usually have time to wait for a response from the system for a long time, especially when it comes to urgent requests.

Remedy landing pages by Conceptzilla
Mobile healthcare app development
When the design is ready, comes the stage of healthcare software development. Developer’s job is to lay out each screen and write code that logically unifies them and allows the approved functionality to work. They also establish interaction between the visible part of the application (frontend) and its invisible part where data is stored (backend).
Usually, entrepreneurs and business owners don’t have in-house teams of developers and prefer to hire development teams so they can outsource most of the work. This way is more economically beneficial: 59% of businesses think cost reduction is a great advantage. It allows you to find the best talents all over the world, it’s more time-efficient and offers flexible management options.
Finally comes the testing. In the case of healthcare apps, inadequate testing may result in serious implications. Not just receiving negative reviews but breaking the law, for example.
Apart from the usual performance, workflows, functional capabilities, and usability testing, there is testing for compliance with privacy acts, how well an app is integrated with other services and devices, whether it receives and sends correct data, etc.
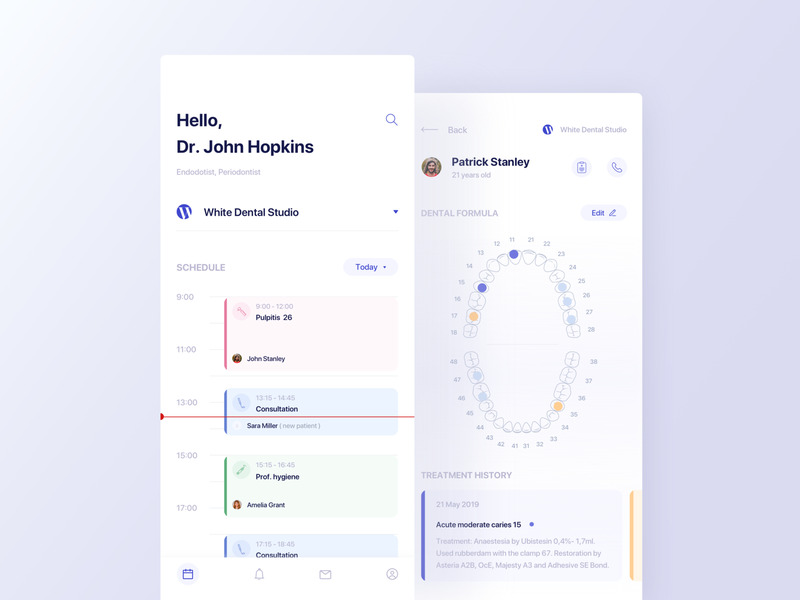
Medical app for dentists by Anna Truong
How much it costs to create a healthcare app
The price for developing an application depends mainly on its complexity and the number of screens, whether there is an already existing corporate identity, and the list of technological functionalities. Compare a relatively simple meditation app with a complex telemedicine solution or a management platform for a medical center.
The most convenient way to calculate the final cost of medical app development is to base it on an estimate of the working time of specialists. The total number of hours is taken into account.
The hourly rate is between $40-45 for development and $70-80 for design, depending on the service provider you choose.
To create a fitness app with 5-10 frames, you need:
- UI/UX design with static 2D art: 210 hours x $80 = ~$16 800
- Custom iOS application development with essential features: 930 hours x $45 = ~ $41 000
- Server-side app development and testing: 400 hours x $45 =~ $18 000
Total average cost: $75 800
These numbers are not precise. It all depends on the implementation and the amount of time spent. You can get the approximate cost to create a healthcare app right now by using Project Calculator. It offers different variants for design, branding, and development, so you can get a full image of what to expect.
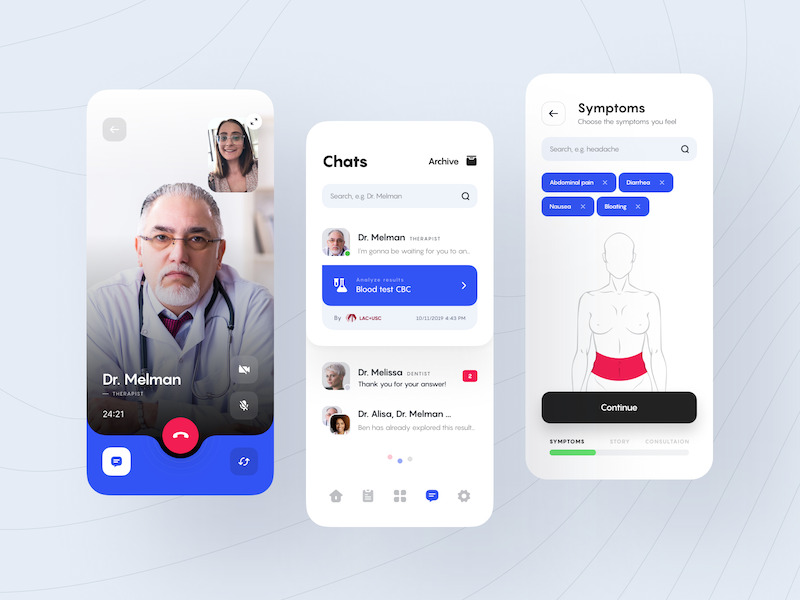
Telemedicine Y – Call, Chat, Symptoms by Alexander Plyuto
mHealth applications market promotion ideas
OK, so your healthcare app development process is finally at that stage when your app is ready. What’s next? Releasing it to the App Store or Google Play and doing your best to promote it among your existing and potential clients. At least 30-35% of your total budget should be reserved for marketing. Determine your marketing strategy depending on your product. B2B and B2C approaches are very different.
How to do marketing of healthcare applications? Broadly speaking, you have two major goals in both cases:
- To increase brand awareness
- And to attract people to your app.
You can do it by:
- Creating a landing page and making sure it’s SEO-optimized.
- Advertising on social networks, PPC, and other types of advertising.
- Working with social networks (SMM).
- Submitting your app to the ProductHunt.
It’s a good idea to ask your users for feedback, especially after releasing an MVP version. Your users can become a well of useful information.
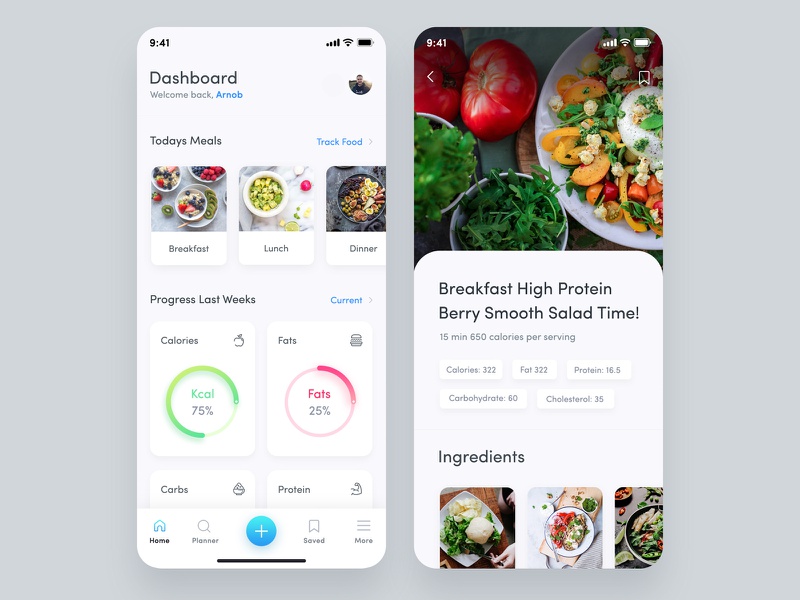
Meal Planner Application Design by Masudur Rahman [8]
Trends in mobile healthcare app development for 2023
As part of your healthcare app development, you’ll need to make sure that your app stays relevant with time. The majority of today’s app development trends are connected with technologies. The technological developments of recent years made it possible for many businesses to get established and developed and to create custom medical software for their particular fields. As a result, patients, along with doctors and medical institutions greatly benefit from it. Even simply being able to monitor their state of health and nutrition level greatly simplifies many people’s lives.
AI
AI is already a part of the following medical tasks: diagnosing diseases, prescribing treatment, structuring and analyzing data from medical records, identifying patients in need of emergency care, monitoring the movement of doctors and patients in medical institutions, planning the work of hospitals and clinics, visualizing images of ultrasound, CT, MRI, creating medicines.
Speaking of more lifestyle-oriented apps, AI algorithms are used, for example, in modern chatbots. Chatbots can be used to gather primary information. They ask questions, offer response variants, and connect patients with doctors in the initial stages and making the process easier afterward.
Blockchain
Blockchain is a technology for creating databases and managing complex operations and is mostly associated with cryptocurrency. Blockchain in healthcare is used to manage electronic health records, conduct clinical and biomedical research, remote patient monitoring, improve insurance and billing procedures, and analyze medical data.
VR and AR
The acronyms AR and VR are associated primarily with the gaming industry. The potential for using AR and VR is much wider, which is confirmed by their modern examples in educational app development, for example.
Such tech is used to fulfill a multitude of functions from training surgeons to helping patients cope with mental problems and make a diagnosis. For example, the Anura mobile app can measure the state of one’s health through a 30-second facial scan.
Following the topic of closed-down fitness centers, here’s where the technology in fitness is turning AR and VR fitness from a modern fad to a really sensible idea. For example, FitXR’s BoxVR virtual reality sports app has made a name for itself in the growing digital fitness niche, and, thanks to the pandemic, attracted $7.5 million.
IoT
The Internet of Things (IoT) is widely used in medicine in various sensors that allow you to monitor the condition of patients. Devices with IoT technologies control and account for medicines and the use of special equipment.
Moreover, in many regions of the world, there is still no affordable medical care. In such cases, the transition to telemedicine becomes effective — an interaction between a doctor and a patient online using mobile applications and services.
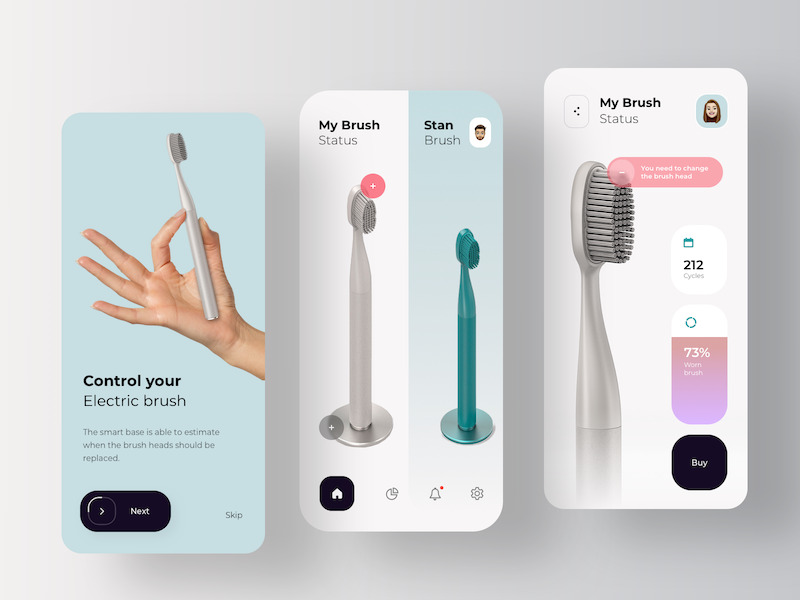
Application for Smart Toothbrush by RonDesignLab
Chatbot
Numerous chatbot use cases targeted directly at the healthcare sector promise to make changes in a way that is more intuitive, immediate, and individualized. Chatbots have already raised the standard for customer support and service. If the same methods are emulated, healthcare businesses can start using mobile apps to provide patients with customized and immediate healthcare services facilitated by chatbots.
Wearable Devices
Over the past few years, wearable technology has gained popularity. This technology is now influencing our daily lives, from Apple smartwatches to FitBits designed for specific sports. Wearable devices have a variety of healthcare applications, including cutting-edge ones like wearable ECG monitors and diabetes monitoring equipment.
The rapid adoption of wearable technology presents more opportunities for healthcare practitioners to create medical apps with device connections. These tools then collect crucial data, including blood pressure, heart rate, blood sugar level, and more, to enable doctors to better understand their patients’ health.
Telemedicine
While telemedicine has significantly changed the healthcare sector by bridging the distance between patients and doctors, adoption continues to grow. Since these apps enable contactless healthcare procedures, it was fairly easy for healthcare providers to handle incidences such as the COVID pandemic.
Create demanded healthcare apps
The development of digital products gives us the most important thing — the ability to save time. Today, a smartphone with internet access is enough to instantly send a letter, find a better route, or make a reservation at a restaurant. That is why you can see an increasing dynamic in the development of the medical applications segment that can make monitoring health, and nutrition, and communicating with a doctor easier and faster.
Software development can significantly optimize business processes in healthcare facilities. Healthcare software companies produce solutions that simplify patient routing in medical organizations, reduce paperwork, and allow you to learn about new research and legislative changes.
Creating a viable product is a team effort. An experienced healthcare mobile app development company can help you to minimize the number of mistakes at the start of the project and quickly implement the MVP version, and in the long term — save your money and get a high level of service. Any healthcare app should be easy to use, functional, and intuitive for a wide audience.
Do you have an idea for a healthcare app? Have you been thinking about launching a medical software product for a long time? Do you have additional questions about custom medical software development? Contact us to get answers to all your questions and let’s create a demanded product together!
This article was originally published in July, 2020 and was updated by Mary Moore in March, 2023 to make it more relevant and comprehensive.
