Is there any more room for new apps on the market, or is Netflix the one and only solution? We think it’s still possible to create a viral movie app, if we follow a few simple rules.
Contents:
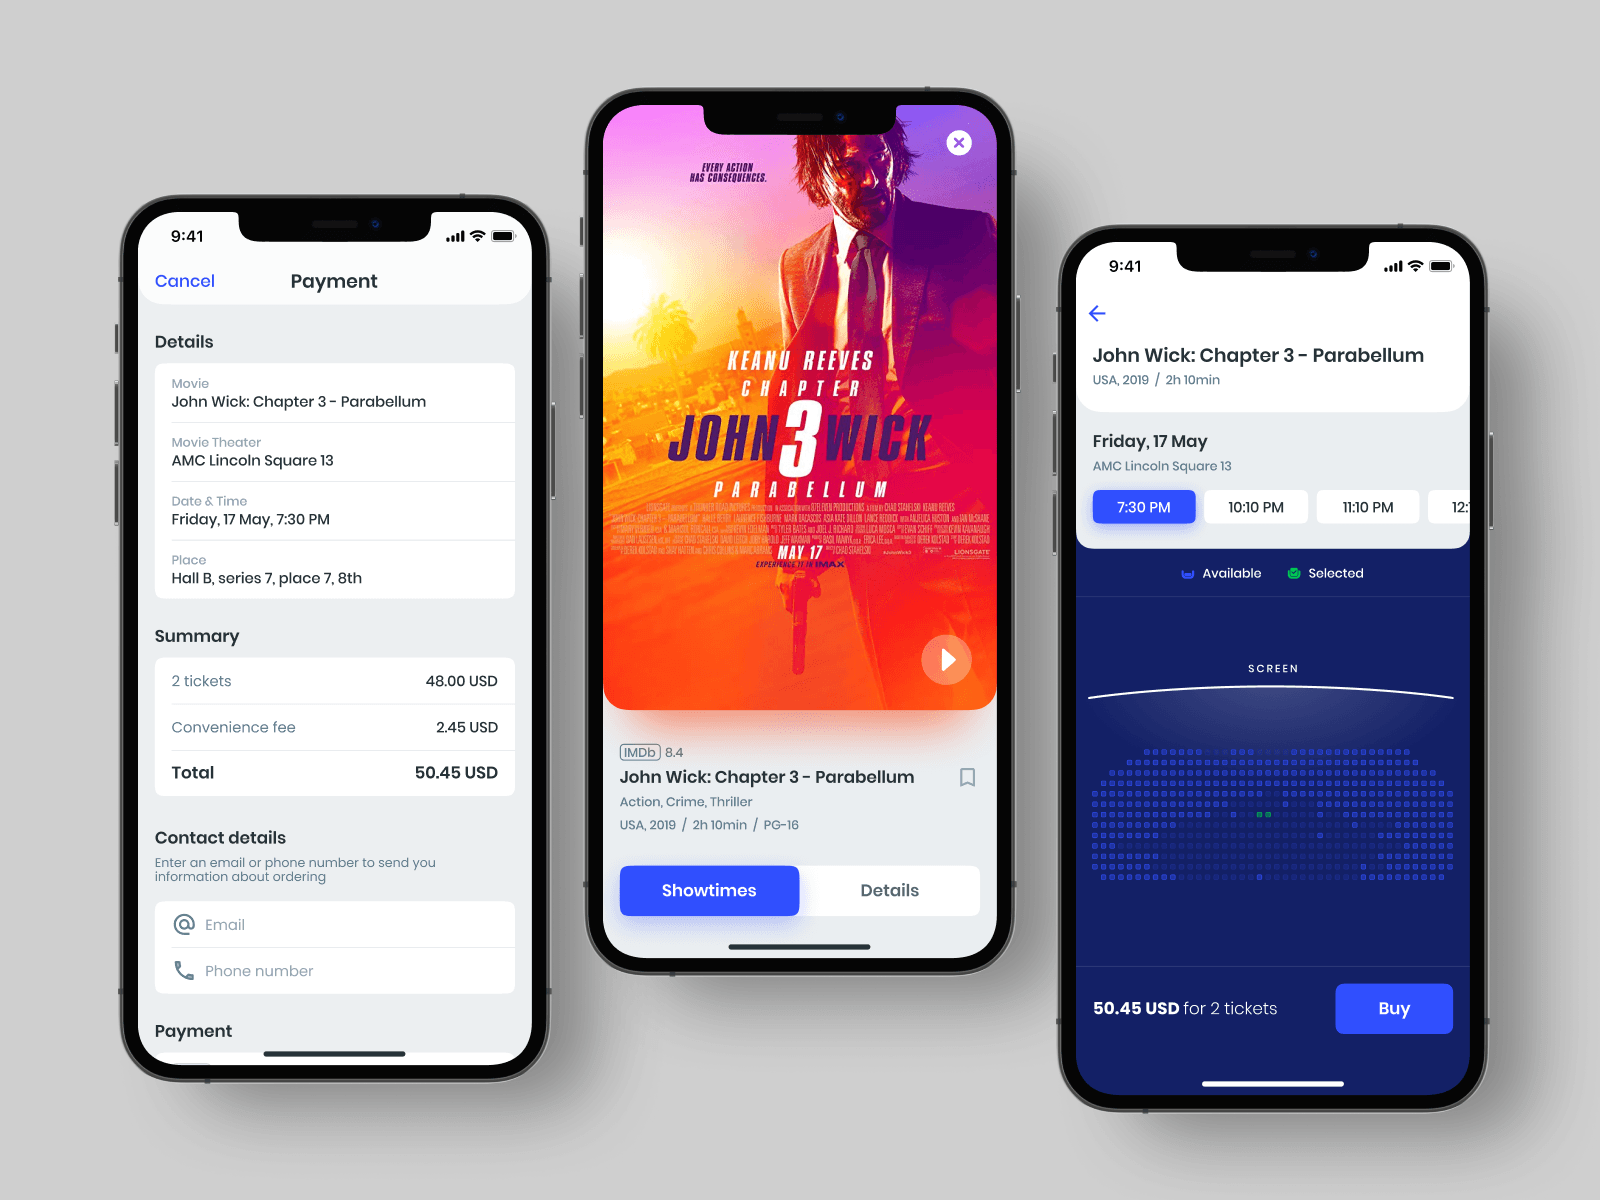
Hugo Piet, a self-taught front-end developer, animated and expanded our recent design concept for a movie application. We think it turned out gorgeous:
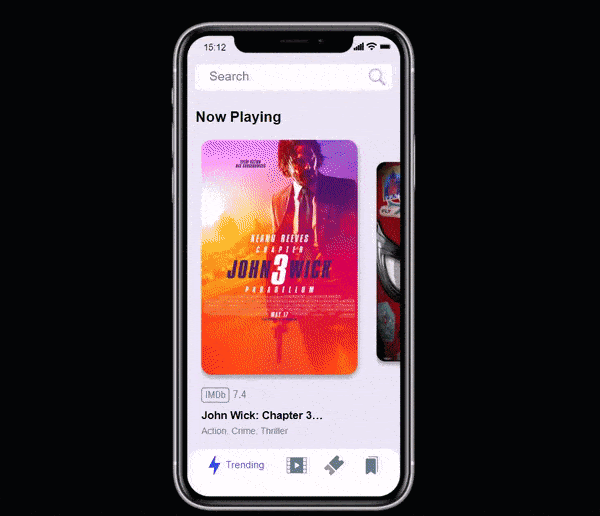
Final demo on CodePen
He kindly provided us with some tips on how to make concepts come alive with coding. You’ll see his text below, followed by a few of Shakuro’s remarks in cursive.
The Markup
Many front-end folks will tell you that all you need to make a good app or a website is HTML, CSS and JS. And they are right! Structured markup is not only accessible but also very easy to understand, and having your DOM manipulation arsenal ready will take you a long way.
This demo is an example of how you can achieve very clean UI animations with these tools.
Many thanks to Greensock, and their animation platform GSAP. This is by far the best animation tool in JS out there, both in features and performance. If you’d like to know more about it, Shakuro has a separate article on the topic.
The Styling
I used CSS custom properties for color re-use throughout the “app”. CSS custom properties open a world of possibilities both for styling and interactivity, since you can change them in Javascript. Careful integration of Shakuro’s design is the driving focus here, but there are two major things to consider so that the animations render well when we implement them:
1. Overflow
The dynamic horizontal scrolling and the vertical scrolling of the selected movie view blend to create an illusion that you stay in the same “place”. The natural transition is achieved thanks to two things: FLIP (First, Last, Invert, Play) animations, but we’ll go back to that, and… hidden scrollbars! Hiding the scrollbars everywhere helps to save screen estate and takes away the impression that we are on separate pages, all for a nicer user experience.
2. Text Overflow
The devil is in the details. For the same reasons mentioned above, the text underneath the movie poster needs to be set up so that the animation will be smooth. The way to deal with text overflow is a recurring issue in web development.
Fortunately, CSS has evolved to give us solid options. In our case, to have truncated text animate into full text, ellipsis is the way to go:

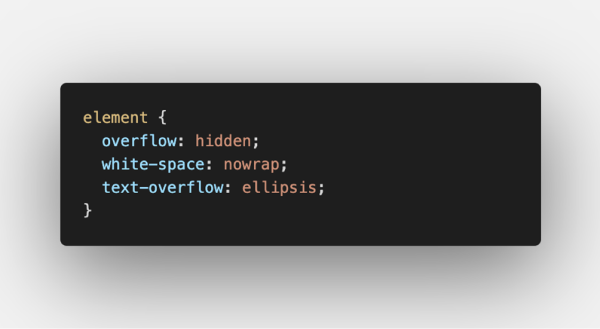
See CodePen for more information
The Core
Where we have HTML, we have DOM manipulation. The whole thing is made of one multi-array object to hold data and three object literals. In the array object, we have simple and nested arrays, with all the necessary information for the movies. I hardcoded all the data because this is mainly a front-end demo.
The first object literal, dynamicClock, is used to have a basic real-time clock on the upper-left corner of the phone screen. With setInterval, I parse the current time every second and update the content of the clock placeholder.
The second object literal, footerNav, gives us a fake top-level navigation on the footer. We have a transition effect between menu icons, but I haven’t actually created any of the other three sections.
With DOM manipulation and CSS transitions, navigation is as simple as a class switch (“active”, “ ”) to translate the active section onto the screen. You will notice I couldn’t find the same icons for the footer navigation.
The third object literal, dynamic scroll, is by far the most important one, and controls the two most important aspects of the “app”: dynamic scrolling and FLIP animations.
Dynamic scrolling
More recently, IntersectionObserver has been the go-to solution for many web developers to implement scroll-based animation from scratch. There are many options, but I sought ultimate performance. And for that, I used the GSAP plugin ScrollTrigger.
This is by far the most performant and cross-browser JS animation tool. It took me a while to find the way to implement the animation as I wanted. Instead of trying to scale the movie posters when they come into view, I defined a timeline with all posters animated one after the other, then linked the animation to the scrollbar of the reel element (thank you ScrollTrigger).
Aside from the scaling animation for the movies that come into view, I needed a way to know which movie was active so that I could trigger the FLIP animation on a click to expand the selected movie. ScrollTrigger, again, brought me the solution. I created a trigger inside the screen element so that, for any card that is between 0 and 80% of the element’s width, it is toggled as active. This way, I made sure if you click outside the active card on screen, the expanding animation is not triggered.
FLIP animations
I’ve been in love with the concept since I first read it. FLIP stands for First, Last, Invert and Play. So what’s it all about? First off, the term was coined by Paul Lewis in his now famous article FLIP your animations. You can find it here.
The whole point of FLIP is to achieve complex (or not) animations with maximum performance (60FPS is the standard ). So instead of doing the calculations (new position, new size, new whatever) when you animate the element, you do them before the animation is triggered.
How, you ask? By following this “simple” method: Store the First state of your element, set your element to its Last state (where, how it will be after the animation), Invert the change, meaning your element is transformed back to its First State, and finally Play your animation, so that the element is transitioned back to its final state with no calculation to perform. You can find a snippet of the general concept in Paul’s original article.
The FLIP plugin
The tool I used for applying FLIP animation to my “app” is the GSAP premium FLIP plugin. You can try it for free on CodePen. Needless to say, the plugin makes it very much faster to work with this animation technique, which can otherwise be quite verbose and tricky. I needed to use it on two animations: the one to expand (and close) the selected movie, and the one to expand (and close) the selected trailer.
Feel free to jump in the code to take a closer look!
Thanks for this great tutorial!
Lack of experience with real projects is a bad excuse for not having a portfolio. You can always choose between many of Shakuro’s different web and mobile concepts to work with! Just don’t forget to mention us. Contact Shakuro if you still have questions!