
React Native for Android
A little while ago my team lead came up to me saying: “Hey Vitya, let’s check out some new technology and redo our app with that library, and make some conclusion about that!” ?
Now, I’m not an expert in JavaScript but I investigated the thing for some time and remade our new/old Android application called Carwash (a native Android app, made with Java). So with not a lot of experience in JS, I started the implementation and it was awesome to explore something new.
Contents:
Setting Up React Native
As an Android developer, I have already had every SDK from the official website installed. And if you are new to this, I’d recommend you to install Android Studio, Android SDK, Gradle, and a bunch of libraries from Google (everything I mentioned is already there in .ZIP files).
Don’t forget Java 7 or 8, Android Studio will also warn you about that. And don’t forget about and emulator, I would suggest using Genymotion, it is significantly faster than the studio built-in one.
After all manipulations, it’s better to check the installation, so just create a sample app. All you need is love and patience:
1. Navigate to Android Studio → File → New → New Project.
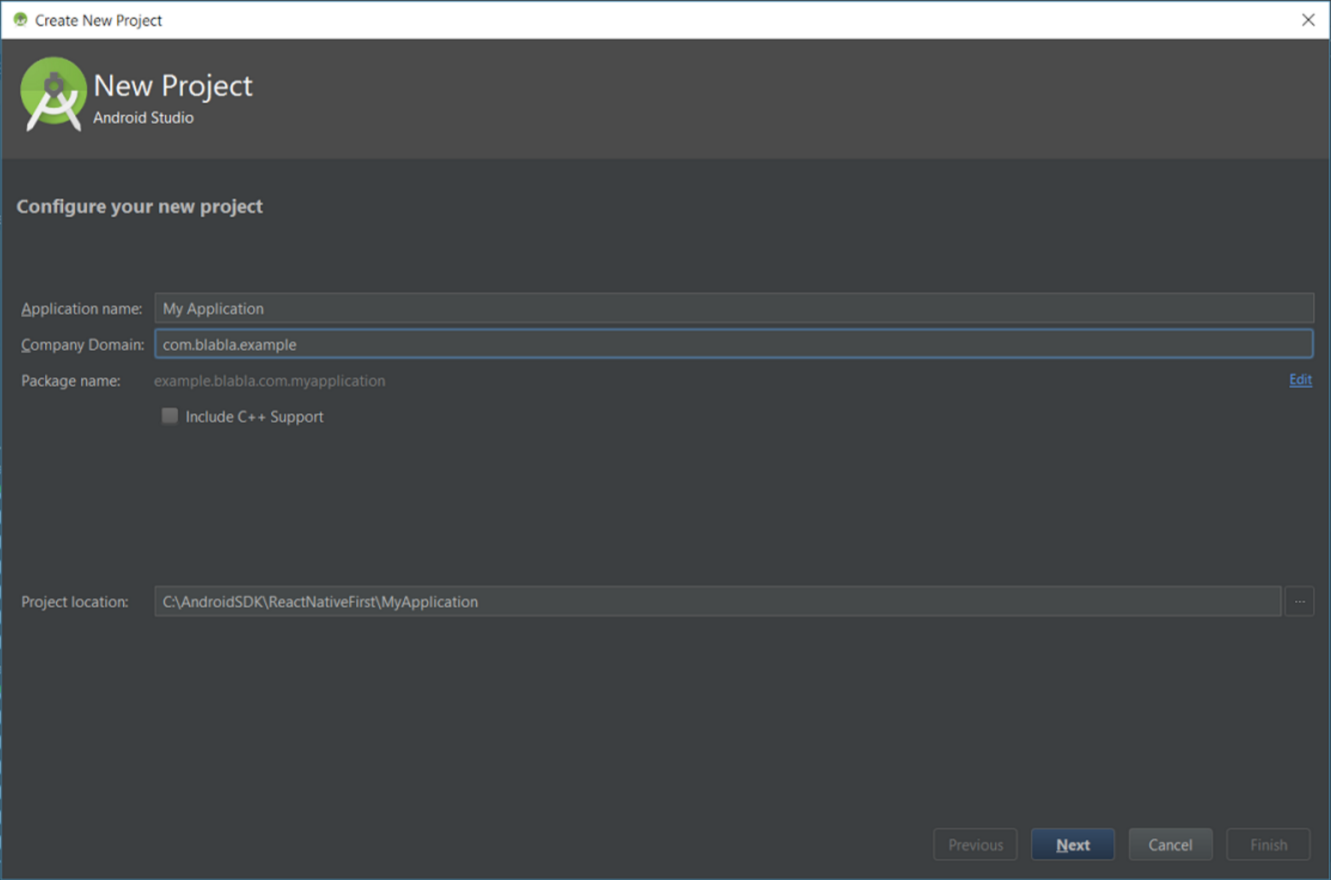
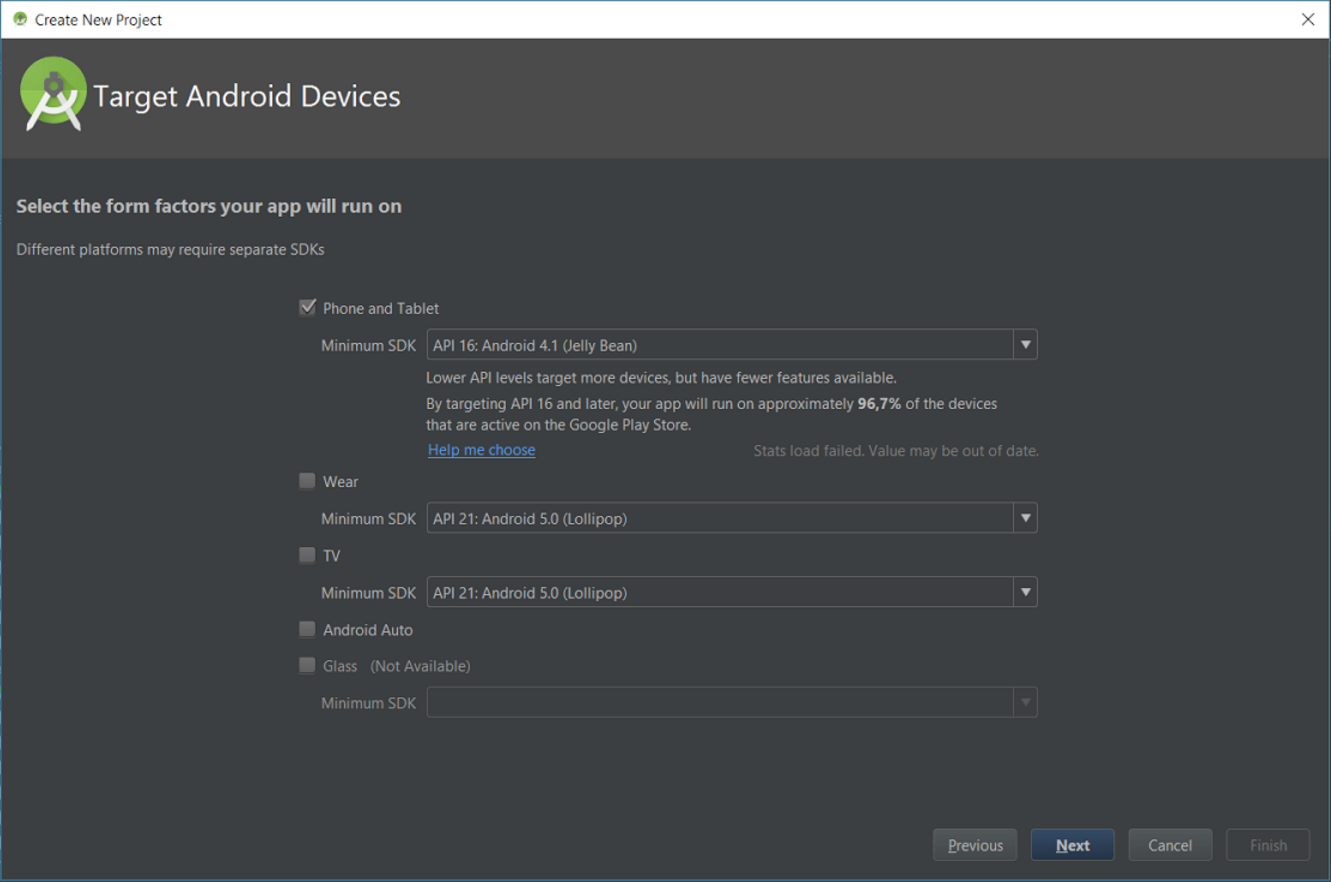
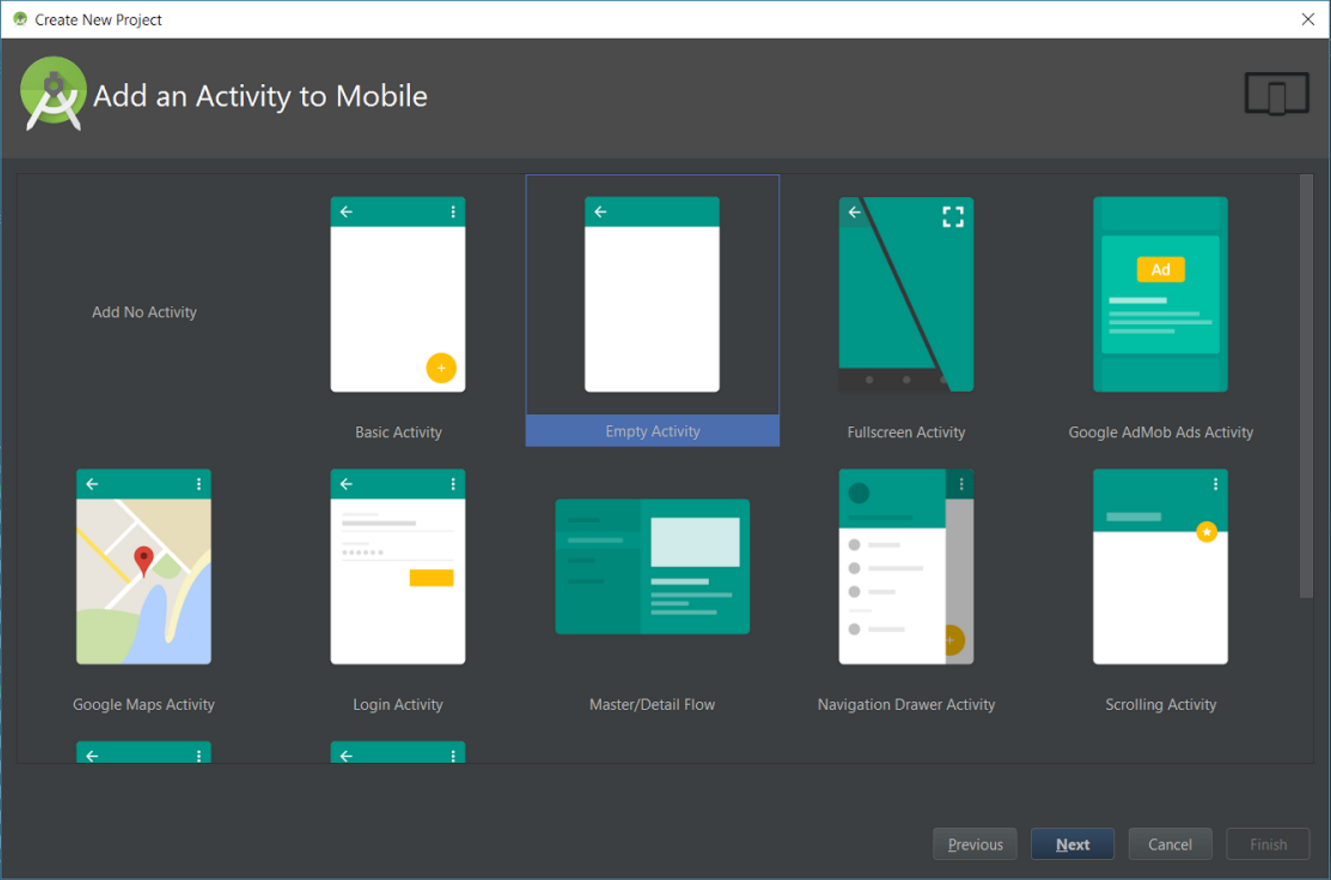 2. Select empty project (Hello project) and wait for synchronization.
3. Install the app to Genymotion or any real device.
4. Make sure your Android SDK and libraries work together. if they do – that’s it, Android part is on! ?
Advanced Setup
Let’s continue with another part, the most interesting one I think:
1. First of all, check out the official documentation and the Getting Started Guide. These include all the instructions on how to install Android. If you have already done it, you can double check.
2. Once you have node.js and a simulator, you should install react-native-cli which is the suite of tools that compiles with your app and runs it:
npm install -g react-native-cli
3. If the setup is ok, you are ready to go ?
Note: NPM is the node.js package manager. We’ll use it to handle dependencies throughout this React.
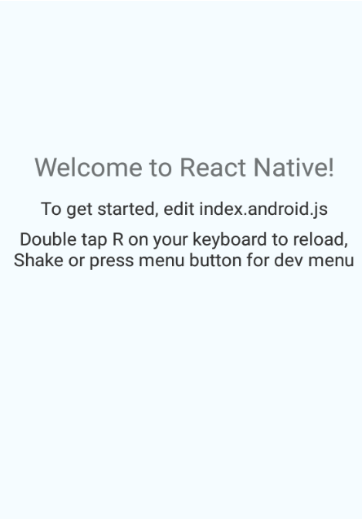
React-Native Init Implementation Example
The easiest way to install react native Hello Project with init, all dependencies and folders with all needed modules, is just use the React Native Utility:
react-native init Carwash
React-native init creates a new Carwash directory, installs the necessary dependencies under Carwash/node_modules/, sets up a JavaScript compilation pipeline using Babel, and creates two index.js files – one for Android, and one for iOS. It also puts some native app stuff under Carwash/android and Carwash/ios.
We need two index.js files because most apps offer a different experience on Android and iOS. You can share code between them and you might want to put it together differently. The easiest way to do that is to use a different index file.
To install your init app:
1. In command line, run the following commands:
cd Carwash

react-native start // before first run

react-native run-android
2. In my case, after that I got an exception:
 problem occurred configuring project ':app'.

> Failed to find Build Tools revision 23.0.1
It makes sense because I have built the tool 24.
3. To fix that, edit the android/app/build.gradle file manually:
android {
buildToolsVersion "23.0.0" =>”25.0.0”
}
4. After that, you’ll get awarded with a:
Developing The React Native UI
Ok, so we figured out how to start a project, run your app, and some debugging basics. Let’s fire up the editor and write some code.
Use whichever text editor you’re used to. A lot of folks use WebStorm, I like Emacs. I’ve heard Atom is great for JavaScript and Sublime looks like a popular default. Make sure syntax highlighting and code indentation work for JSX.
We’re building a small app, so all of our code goes into the index.ios.js file (or index.android.js if you’re building for Android). React Native has some code set up for us already. It comes in 3 sections:
- Imports to load React and some React Native components
- the JustATributeApp component with a render method
- style definitions because React Native doesn’t use CSS
We’re using the modern JavaScript by the way, ES6. If you’re not used to the syntax, you’re not alone.
But I’ve built an interactive ES6 cheatsheet to help you out:
import React, { Component } from 'react';
import {
AppRegistry,
StyleSheet,
Text,
View
} from 'react-native';
export default class Carwash extends Component {
render() {
return (
// JSX stuff
);
}
}
const styles = StyleSheet.create({
// style stuff
});
Some React Native Constants
Let’s define the images and add an import for images (the component for rendering images). Before I created a new src/img folder, I’ve put our images there first:
import React, { Component } from 'react';
import {
AppRegistry,
StyleSheet,
Text,
View,
Image,
} from 'react-native';
var background_street = require('./img/background_street.png');
var car_wheel = require('./img/car_wheel.png')
I use background_street and car_wheel for styling my app:
var styles = StyleSheet.create({
container:{
backgroundColor:'#046B9E', // blue background etc
flex:1
},
itemStyle:{
marginRight:1,
width:72,
height:95,
justifyContent:'center',
alignItems:'center'
},
imageItemStyle:{
width:50,
height:50,
bottom:10,
resizeMode: 'center',
},
carWheelStyle:{
bottom:10,
resizeMode: 'contain',
height:70,
marginLeft:5,
marginRight:5
},}
- React Native uses JavaScript to define the stylesheets. It looks like CSS because it’s meant to do so. You can think of each key in the main dictionary as a CSS class and each child key as a CSS property.
- They use camelCase instead of dash-case. Is that what it’s called? Background-color becomes backgroundColor, text-align is textAlign and so on. You get the idea.
- There’s no nesting unless you use extensions. We’ll explore those later.
I changed container.backgroundColor just because I could, removed welcome and instructions because I’ll get rid of them, added image, and imageLabel.
React Native uses flexbox to layout boxes on screen. I use flex: 1 and flex: 2 to specify how high of a priority something should get. This will make more sense when we put images on screen.
Generally speaking, you should never define fixed widths or heights in React Native. Let the layouting engine do that for you. Your job is to define the proportions.
Rendering Images With Captions in React Native
Great. We have the styles and the image definitions. Let’s make that render method. This is how React renders UI, by the way: you build components with one render method in each of them. The method defines what a component looks like, which child elements it uses, and such.
We’re using the JSX, which looks like HTML in your JavaScript. This makes it familiar and easy-to-use. But it’s not HTML – it is “JavaScript behind the scenes”, which makes it efficient to render and totally awesome to use.
One of my favorite features is that you can put any JavaScript object or function in what looks like an HTML attribute. I’ll use this a lot.
So here we go:
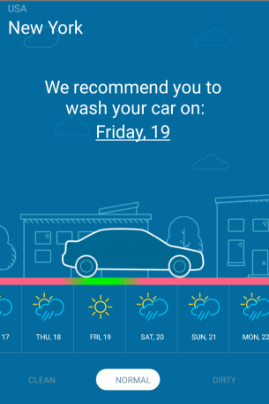
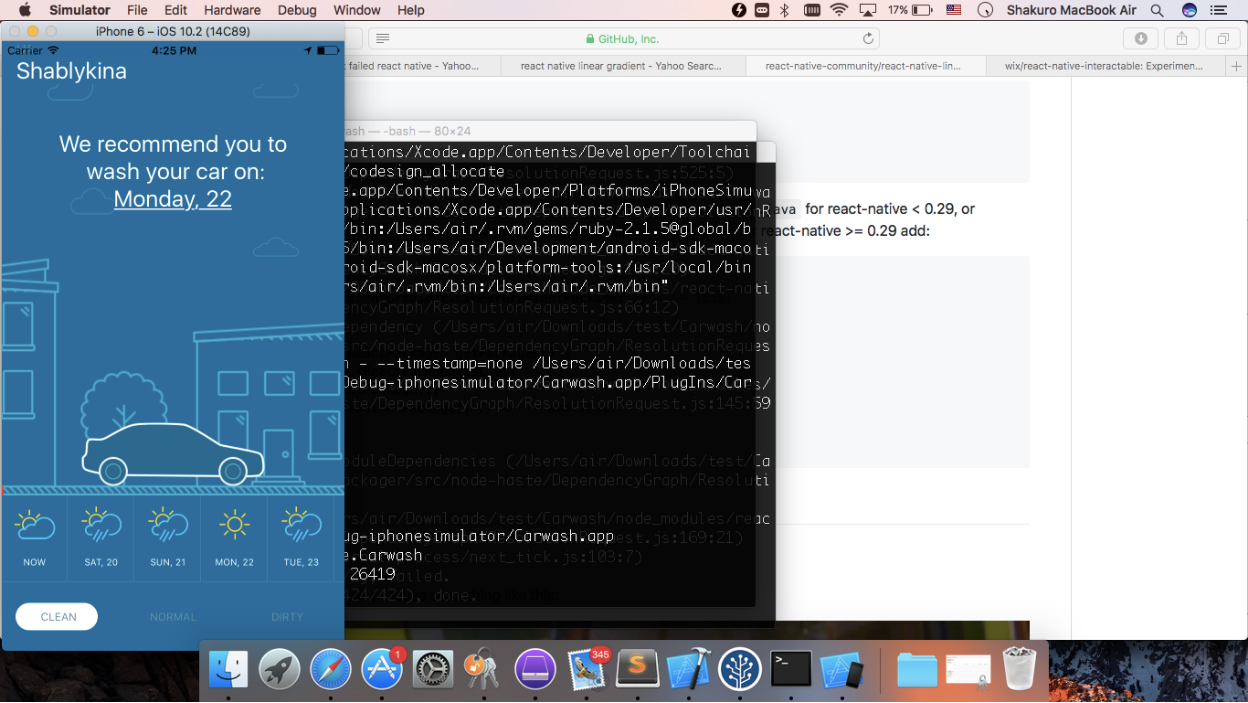
1. Create the scrollable layout, it depends on 15 items which I’m getting from a free weather API.
render() {
return (
<View style={styles.container}>
<View style={{marginLeft:16}}>
<Text style={{fontSize:14,color:'#ffffff',opacity:0.5}}>USA</Text>
<Text style={{fontSize:25,color:'white'}}>New York</Text>
</View>
{this.getWeatherListView()}
{this.showCarView()}
{this.showCarStateButtonView()}
</View>
);
}
2. Find the upper methods on GIT.
3. Describe getWeatherListView():
We need to use scrollview with horizontal listview with blue background and gradient line:
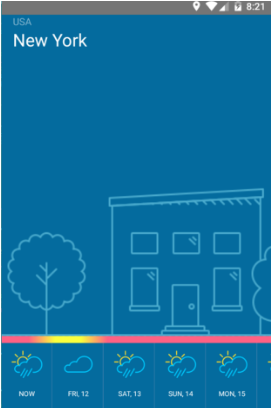
Note: before I started, I used the lib for gradient line. All the info you can find on Git, it’s very simple to use.
4.Configure the view to scroll horizontally and without any indicators:
return <ScrollView
showsHorizontalScrollIndicator={false}
	 horizontal={true}>
// HERE WE SHOULD PUT SCROLLABLE CONTENT
	<View style={styles.scrollableView}>
<Image style={styles.backgroundStyle}						source={background_street}/>
<View style={styles.horizontalListView}>
<LinearGradient
  start={{x: 0.0, y: 0}}
  end={{x: 1, y: 0}}
  style={{height:10}}
  colors={['red','yellow','pink','orange']}/>
			<ListView 												 	showsHorizontalScrollIndicator={false}
            		horizontal={true}
				enableEmptySections={true}
				dataSource={this.state.dataSource}
				renderRow={(rowData,sectionID,rowID) =>
<View style={styles.itemStyle}>
					<Image style={styles.imageItemStyle}									source={this.getItemDrawable(rowData.weather[0])}/>
<Text style={{fontSize:10,color:'#ffffff'}}>					{(rowID!=0)?this.getItemText(rowData.dt*1000):'NOW'}
				</Text>
<View style={{position:'absolute',backgroundColor:'#367DAA',
bottom:0,width:72,height:1}}/>
								<View style={{position:'absolute',backgroundColor:'#367DAA',
					right:0,width:1,height:96}} />
</View>
</View>
</View>
</ScrollView>
getItemDrawable(weather){
var drawable = icon_clear_sky;
     	if (weather.icon.match('01'))drawable=icon_clear_sky;
    	if (weather.icon.match('02'))drawable=icon_few_clouds;
           if (weather.icon.match('04')||weather.icon.match('03'))drawable=icon_clouds;
           if (weather.icon.match('09')||weather.icon.match('10'))drawable=icon_rain
           if (weather.icon.match('11'))drawable=icon_thunderstorm;
if (weather.icon.match('13'))drawable=icon_snow;
	if (weather.icon.match('50'))drawable=icon_mist;
	return drawable;
}
// moment()
getItemText(miliseconds){
		return 	moment(miliseconds).format("ddd, D").toUpperCase();
}
5. And of course, configure the main async operation with server. This method should be called somewhere in the constructor:
async getWeatherApi() {
//just put here your coordinates
		let lat = 44.4;
		var lon = 55.5;
	    try {
	    let response = await fetch('http://api.openweathermap.org/data/2.5/forecast/daily?&appid=f98dbbd0a843d201a2a5b407d984b04e&cnt=15&lat='+lat+'&lon='+lon);
	    let responseJson = await response.json();
	    var weatherList  =responseJson.list;
this.setState({
	    	city:this.state.city=responseJson.city.name,
	    	country:this.state.city=responseJson.city.country,
	    	dataSource: this.state.dataSource.cloneWithRows(weatherList),
        		});
	    } catch(error) {
	      console.error(error);
	    }
6. Now we get the main feature – how to update the UI. For that reason, render script uses the setState () method. We use the setState to update the index in state. This triggers a component re-render, which sees the new index, and renders a new image.
7. In the end, I put additional UI stuff and some logic to make the app more beautiful and fun to use.
You can find the entire app here: https://github.com/kstepanov/reactNativeFirstApp.git and please, JS guys don’t be picky, i’m not a JS developer and i’m still learning.
The React Native Autopsy
Of course, I was kidding saying “beginning of the end”. But as I said before, the React Native library is really a powerful and a really fun tool. It can be useful in applications that need some short time support, for example, an app for a one-shot event, like a concert or a conference.
This kind of apps could also benefit from the fast release cycle available if they dynamically load parts of the application logic from a remote server.
However, after a month long investigation, I can definitely say that React Native is not a mature or stable platform yet.
For that reason, I think React Native is not ready to be used in a long-lasting supported application. This does not exclude the possibility of it to be used for other kind of apps, having the right team with the right level of JavaScript expertise.
React Native seems to be suitable for apps with simple UIs, simple animations, and not long life or performance-critical apps.
Note: I have also installed that application on iOS, unfortunately with some additional conflicts:
Due to Google, I know what is it, just add permission for network communication. Navigate to Info.plist → Add Transport Security Settings → Hit “+” → “Allow Attribute Loads ” → YES.
That’s all u need to know to fix it:
You still can’t see any beautiful gradient lines, because on iOS it does not work. I promise to figure that out and explain it in my future posts.